


Every December, my house somehow turns into a full-blown gnome village.
I never really plan it. Another cute little Christmas gnome just seems to find its way home with me every year. At this point, pulling out the gnomes has become part of our Christmas tradition.
So naturally, I had to turn my love of gnomes into a rock painting project!
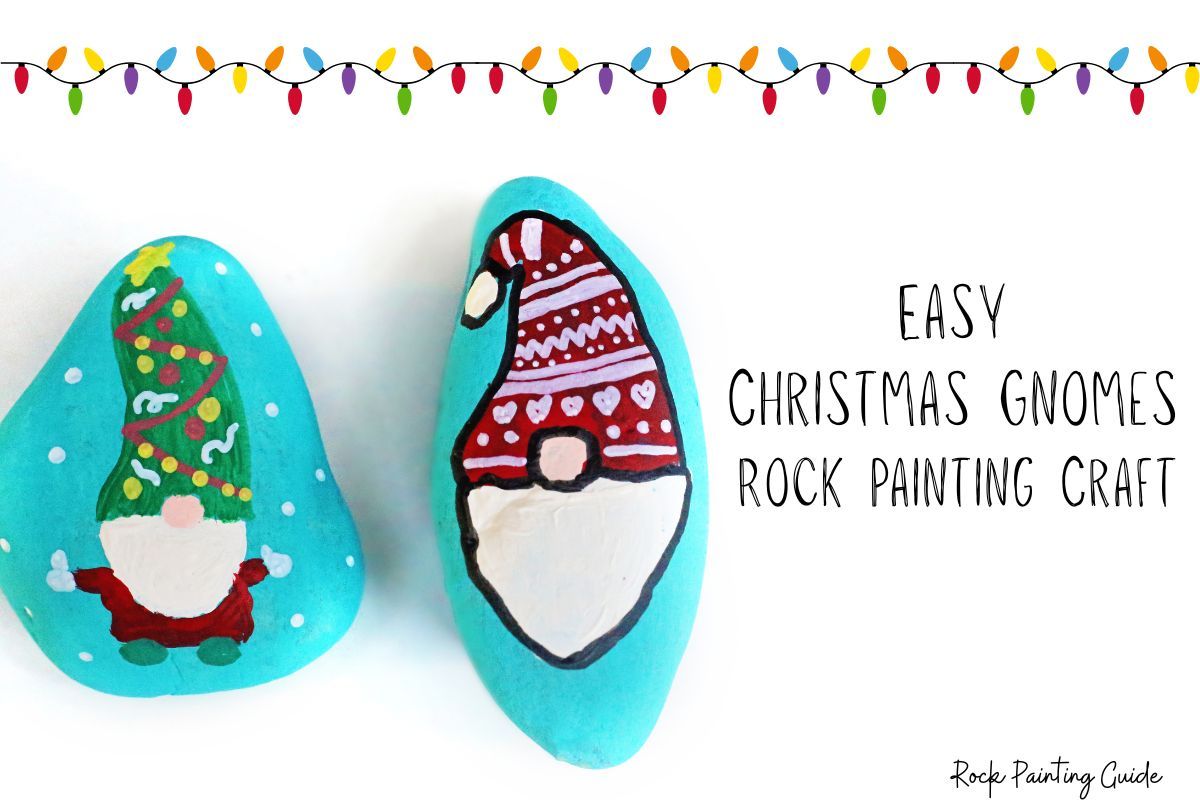
These Christmas gnome painted rocks are colorful, cheerful, and easier to paint than they look. The design is made from simple shapes, so this is a fun Christmas rock painting project for adults, families, older kids, and beginners.
And the best part is that no two gnomes have to look alike.
You can decorate their hats with Christmas trees, candy cane stripes, snowflakes, ornaments, polka dots, or whatever festive design you come up with.
If you need a little extra gnome inspiration, grab my FREE Christmas Gnome Coloring Pages. The printable gnomes are great for trying different colors, hat patterns, and designs before you start painting your rocks.
Before you begin, you can also use the print or email buttons at the top of this post to save the instructions for later.
Table of Contents
Christmas Gnome Painted Rock Supplies
You don’t need a huge collection of art supplies to make these little Christmas gnomes.
Here’s what I used:
- Smooth rocks
- Acrylic craft paint
- Paintbrushes (small detail brushes work best)
- Paint markers (optional)
- Paper plate or palette
- Cup of water for rinsing brushes
- Paper towels
- Clear sealer
Tip: Paint markers are especially handy for tiny ornaments, dots, snowflakes, stripes, and other details. You can absolutely use a small paintbrush instead, so don’t feel like you need to buy extra supplies just for this project.

What Kind of Rocks Work Best?
Smooth rocks with a fairly flat painting surface work best for these Christmas gnome painted rocks.
I especially like rocks that are slightly taller than they are wide. That shape gives you plenty of room for the gnome’s long hat, fluffy beard, and little body.
Don’t worry if your rocks aren’t perfectly shaped. In fact, an odd-shaped rock can give your gnome even more personality.
Before painting, wash the rocks with soap and water to remove dirt and dust. Let them dry completely before adding paint.
How to Make Christmas Gnome Painted Rocks
Now comes the fun part.
Set out your paints, put on some Christmas music, and gather everyone around the craft table. Once you know the basic gnome shape, you can make an entire collection and give each one its own personality.
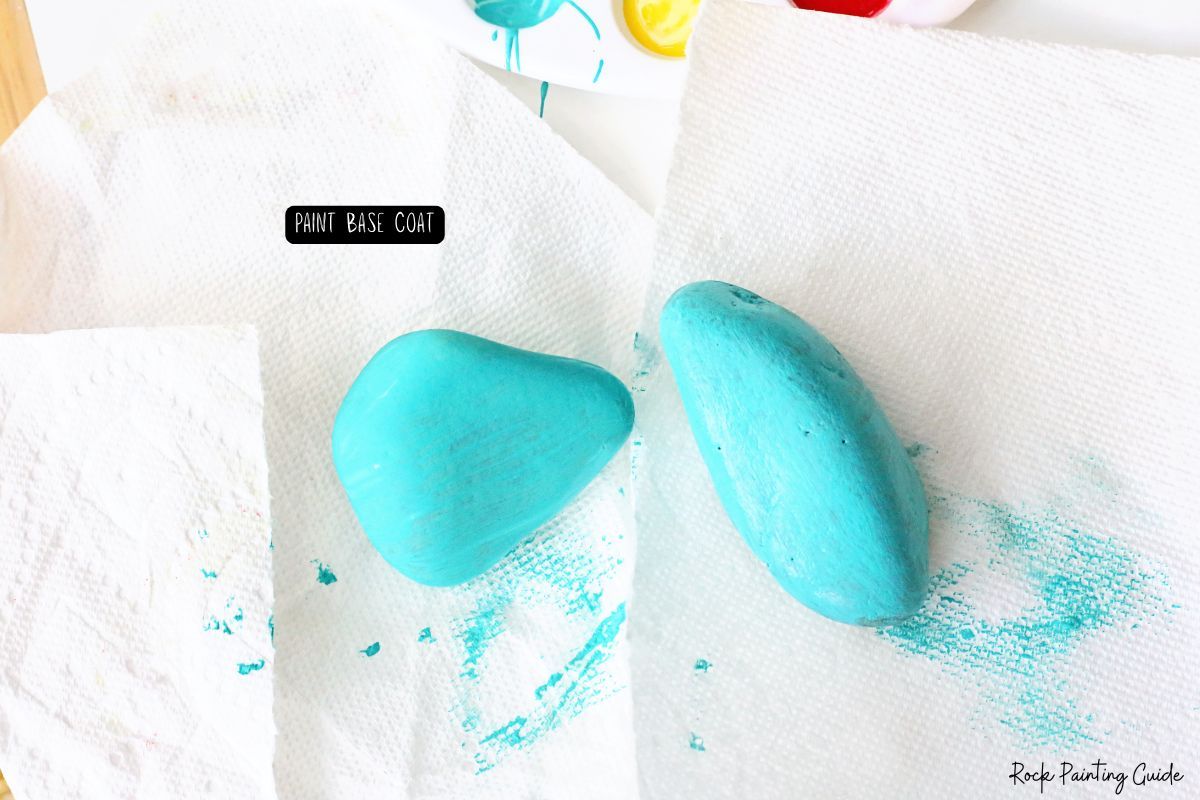
Step 1: Paint a Base Coat
I started by painting the entire rock with a solid background color.
For my gnome, I used a turquoise or soft winter blue. Both colors make a pretty snowy background and help the red, green, and white Christmas colors stand out.
Depending on your paint, you may need two coats to get good coverage.
Let the base coat dry completely before moving on.
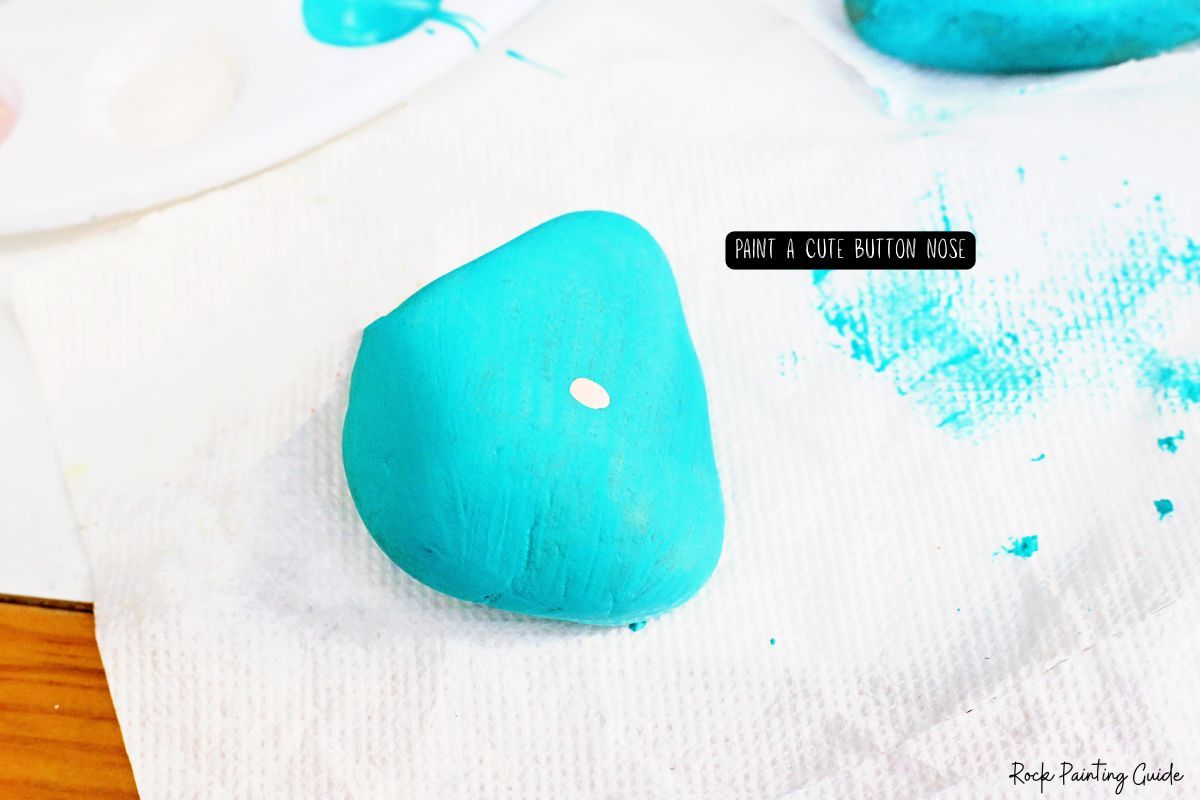
Step 2. Paint the Gnome’s Nose
Next, I painted a small round nose near the center of the rock.
Starting with the nose makes it much easier to figure out where the beard, hat, and body should go.
Don’t worry about making the circle perfect. A slightly oversized or crooked nose can make your Christmas gnome even cuter.
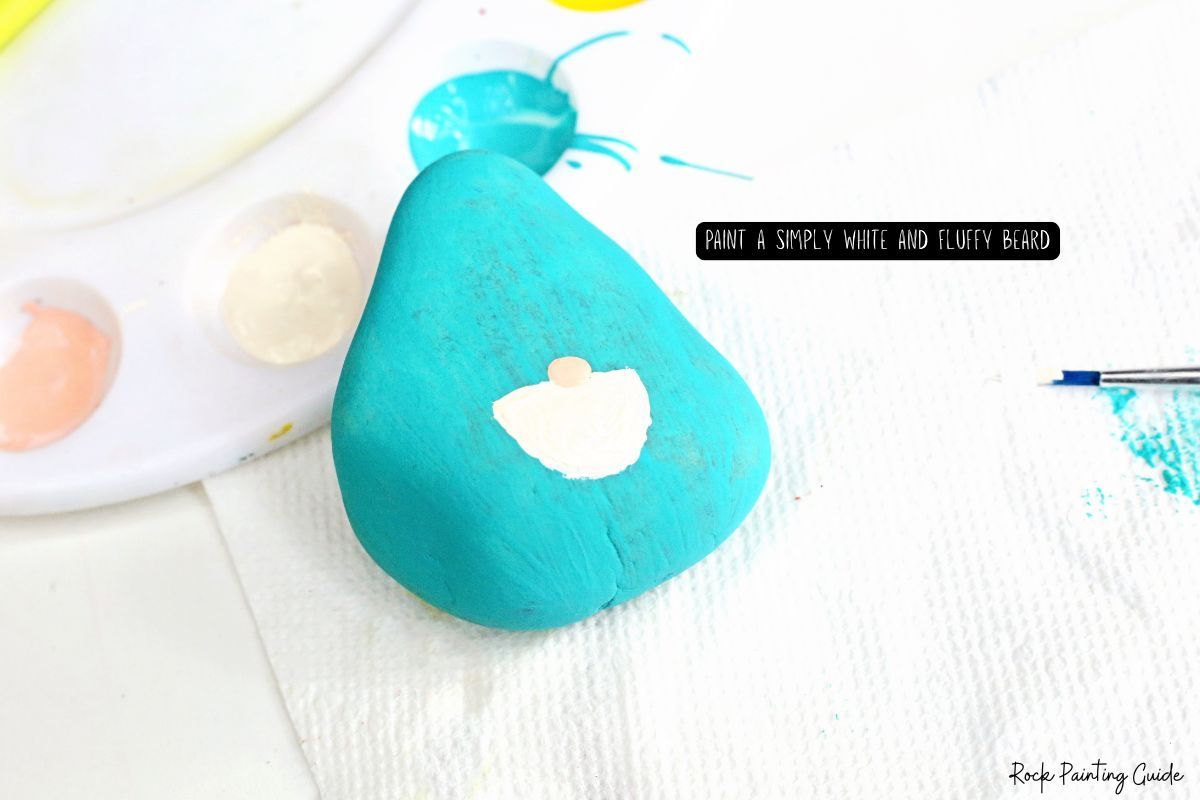
Step 3: Add the Gnome’s beard
Under the nose, I painted a rounded white beard.
You can keep the beard simple or use a small detail brush to add wispy strokes around the edges for a fluffier look.
There is no need to make every little hair perfect. These gnomes prefer low-maintenance grooming.
Let the white paint dry and add another coat if you need more coverage.
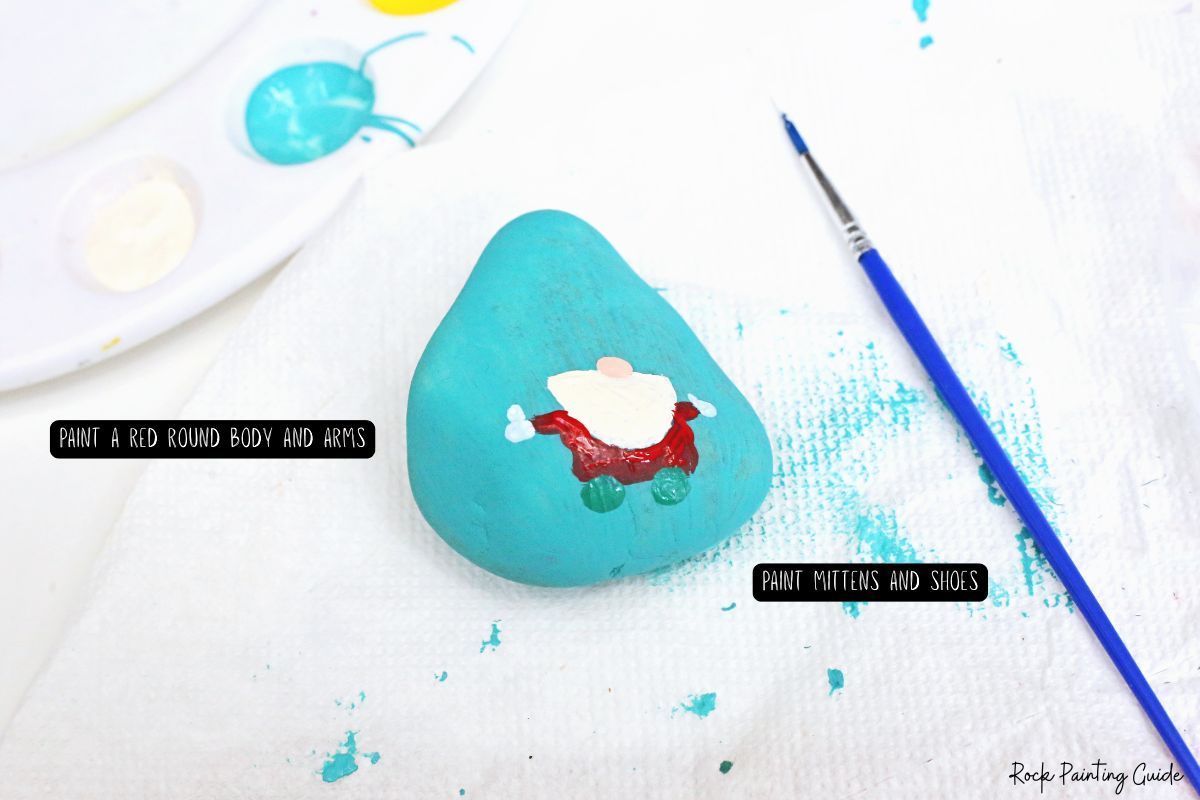
Step 4: Paint the Gnome’s body
Next, I added a small rounded body underneath the beard.
Red and forest green are perfect traditional Christmas colors, but you can use any colors you like.
Then I painted two little circles near the bottom for the shoes and added small mitten shapes along the sides.
At this point, your painted rock really starts looking like a little Christmas gnome.
Step 5: Paint the Gnome Hat
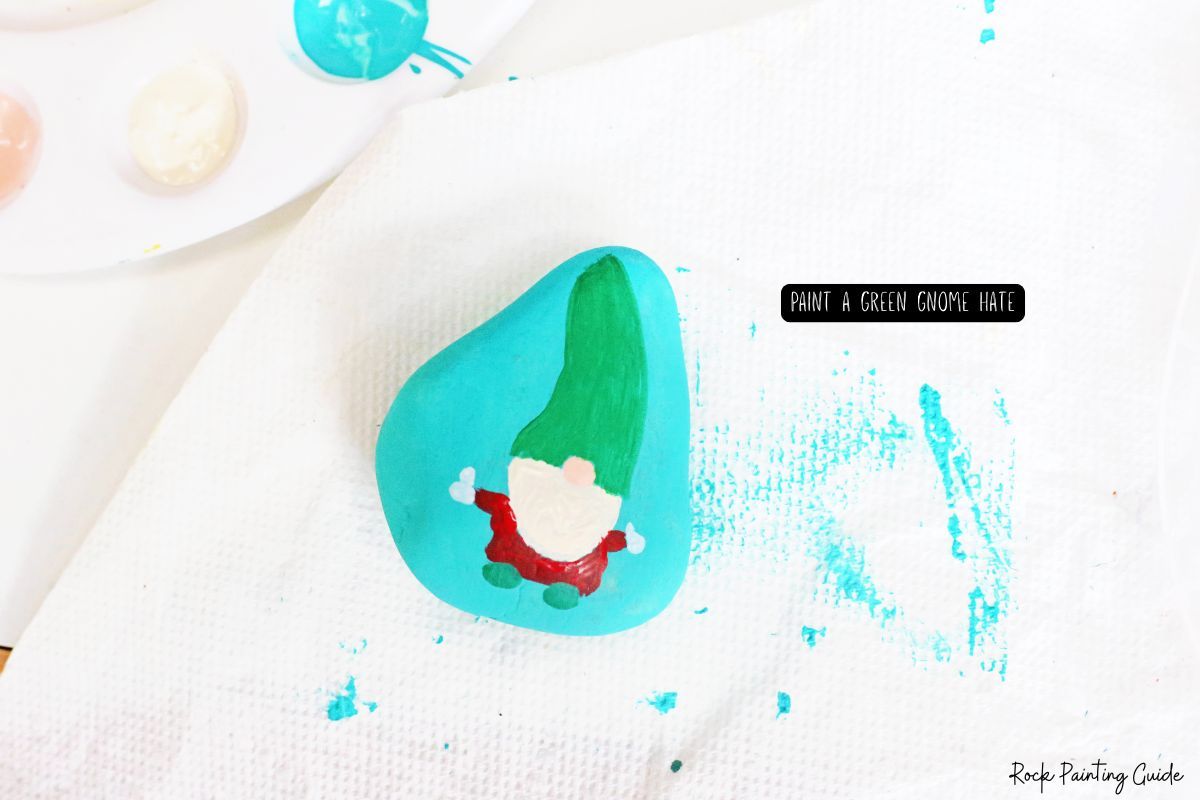
Now it’s time for the best part: that wonderfully tall gnome hat.
I painted a tall, narrow triangle extending above the gnome’s nose and beard.
Don’t be afraid to make the hat extra tall or slightly crooked. Gnome hats aren’t supposed to be perfect.
A long, playful hat also gives you plenty of room to add Christmas decorations in the next step.
Step 6: Decorate the Christmas gnome hat
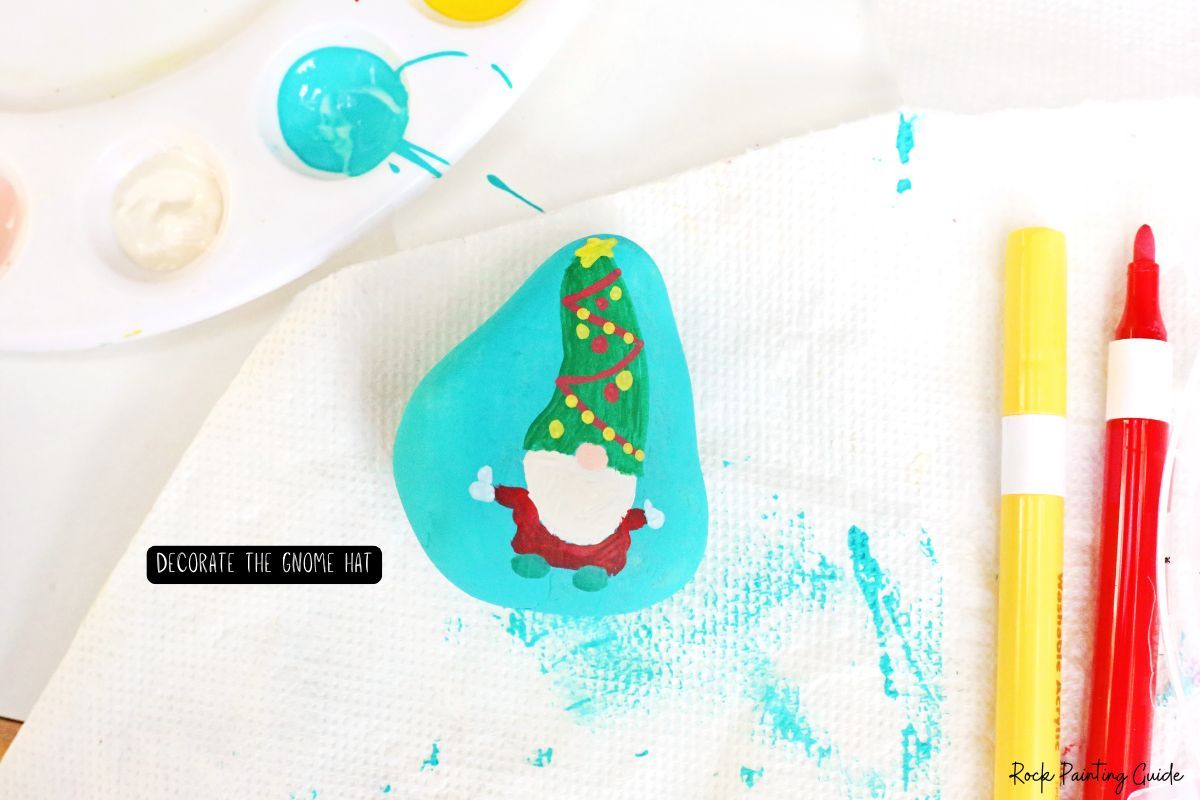
This is where you can really have fun with your Christmas gnome rock painting.
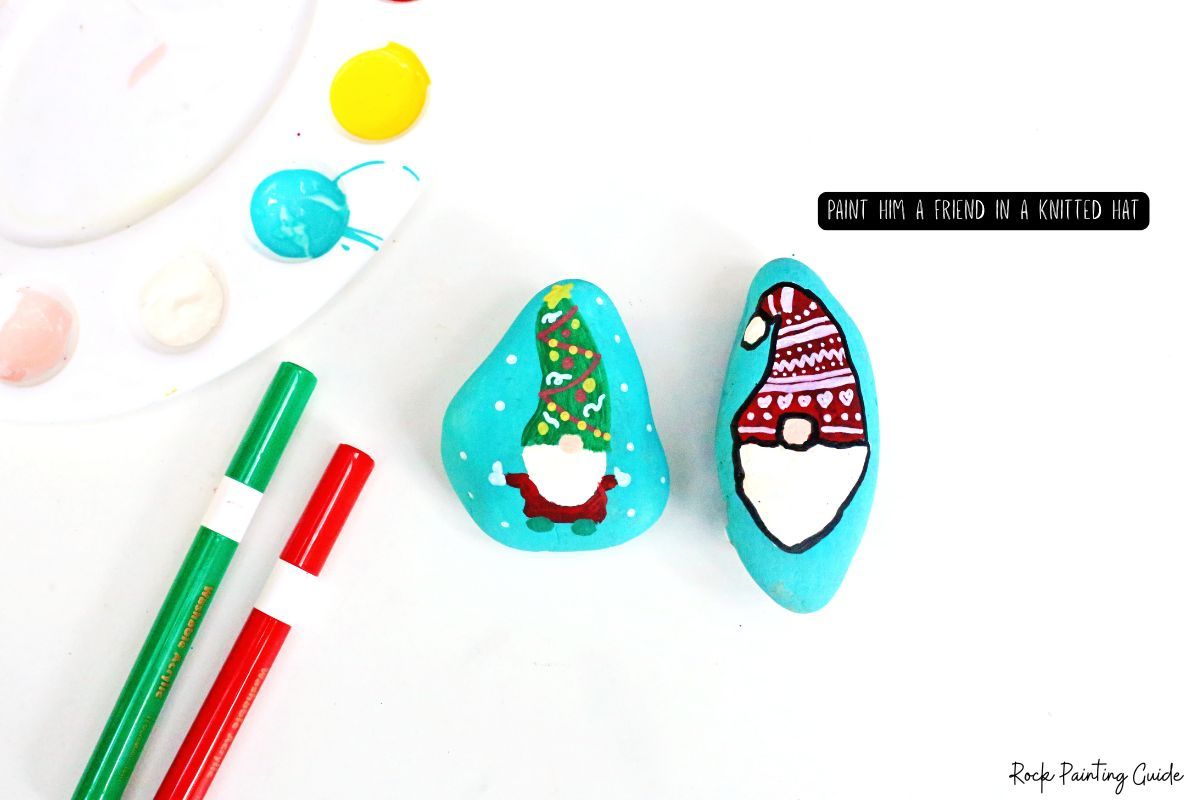
I turned my gnome’s hat into a miniature Christmas tree, complete with garland and tiny ornaments.
You could also decorate the hat with:
- Candy cane stripes
- Polka dots
- Stars
- Snowflakes
- Tiny Christmas ornaments
- Hearts
- Patchwork patterns
- Holly
- Christmas lights
- Simple stripes
A small paintbrush or paint marker makes these tiny details easier to control.
If you’re painting with kids, this is a great place to let them create their own designs. You may be surprised by how creative those little gnome hats become.
Step 7: Add Snow and Finishing Details
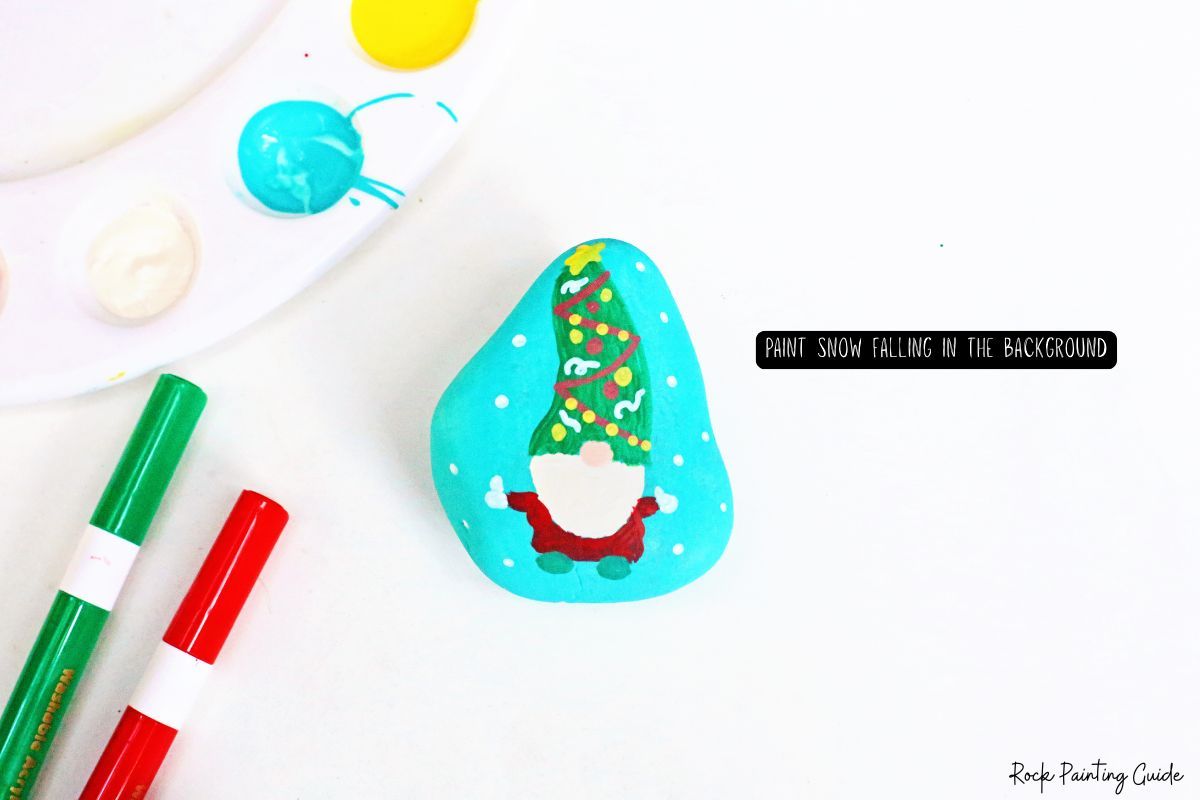
To finish my Christmas gnome painted rock, I added small white dots around the background to look like falling snow.
You can also add tiny snowflakes or a little snow along the bottom of the rock.
Check your gnome for any final details you want to add, then let all of the paint dry completely.
If you’re planning to display your painted rocks outdoors, finish them with a clear sealer to help protect your design.
Tips for Painting Christmas Gnomes on Rocks
The gnome itself is surprisingly simple once you break the design into smaller shapes. Here are a few things that can make the project even easier:
- Let each layer dry. Trying to paint white over wet blue paint or red over wet white paint can quickly turn into a muddy mess.
- Use thin coats of paint. Two thin coats usually look smoother than one thick coat.
- Start with the nose. It gives you a center point for positioning the rest of the gnome.
- Use a small brush for details. A fine-tipped brush makes ornaments, snowflakes, beard lines, and hat designs easier.
- Try paint markers. If tiny brushwork isn’t your favorite thing, acrylic paint markers are perfect for adding small details.
- Don’t worry about perfect symmetry. A leaning hat, oversized nose, or uneven beard can actually make the gnome more charming.
- Keep the first gnome simple. Once you’ve painted one, you can start experimenting with more detailed hats and designs.
- Seal outdoor rocks. Give the paint plenty of time to dry before applying your sealer.
Save this Christmas craft for later! Pin these Christmas gnome painted rocks to your favorite Christmas crafts or rock painting Pinterest board so you’ll have the tutorial when you’re ready for a holiday craft day.
Easy Christmas Gnome Rock Painting Ideas
Once you know how to paint the basic gnome shape, it’s easy to make a whole collection by changing the colors, hat patterns, and little Christmas details.
Try one of these easy ideas:
- Christmas Tree Hat Gnome: Paint the hat green and decorate it with tiny ornaments, garland, dots, or a star on top.
- Candy Cane Gnome: Add red and white stripes to the hat for a simple candy cane-inspired design.
- Snowflake Gnome: Use blue or turquoise paint and add white snowflakes for a wintery look.
- Traditional Christmas Gnome: Stick with classic red, green, and white for an easy holiday design.
- Polka Dot Gnome: Decorate the hat with simple dots using a small brush, paint marker, or dotting tool.
- Christmas Lights Gnome: Paint a strand of colorful Christmas lights across the gnome’s hat.
- Personalized Gnome: Add a name, date, or short Christmas message to the back of the rock.
- Gnome Family: Paint several rocks in different sizes and give each gnome a different hat, beard, or color combination.
You can use the same basic tutorial for every design, so once you paint one gnome, it’s easy to make several more with completely different looks.
Fun Ways to Use Christmas Gnome Painted Rocks
Your finished gnomes don’t have to sit in a bowl after you’re done painting them.
There are plenty of fun ways to use them throughout the Christmas season.
Try using your gnome rocks as:
- Stocking stuffers
- Teacher gifts
- Neighbor gifts
- Christmas table place markers
- Christmas party favors
- Mantel decorations
- Tiered tray decorations
- Secret Santa gifts
- Christmas scavenger hunt pieces
- Kindness rocks
- Small porch decorations
- Handmade keepsakes
You could even hide a few around the house and send the kids on a Christmas gnome scavenger hunt.
Just be prepared. Once you start painting them, gnomes have a funny way of multiplying.
More Christmas Rock Painting Ideas
If one Christmas rock painting project isn’t enough, there are plenty of other festive designs to try.
For a big dose of inspiration, check out my 75+ Best Christmas Painted Rocks of Instagram. It’s packed with ideas for Santa rocks, snowmen, Christmas trees, ornaments, reindeer, and more.
You can also make my Grinch and Max Painted Rocks for another fun Christmas character craft.
And if the kids want to keep creating after the paint has been put away, my 10 Cute Christmas Step-by-Step Drawing Ideas includes easy holiday drawings they can follow one step at a time.
Christmas is one of my favorite times to pull out the craft supplies because you can make decorations, little gifts, and keepsakes at the same time.
Free Christmas Gnome Coloring Pages
Want even more gnomes?
I have 20 FREE Christmas Gnome Coloring Pages filled with cute holiday gnome designs.

They’re fun to color on their own, but they’re also a great source of inspiration for your next set of Christmas gnome painted rocks.
You can use the printable pages to get ideas for:
- Hat designs
- Christmas color combinations
- Beard styles
- Candy cane patterns
- Christmas trees
- Gingerbread houses
- Snowy winter scenes
- Christmas decorations
Print a few pages before your rock painting day and let everyone choose a favorite gnome to use as inspiration.
Head over to my Free Christmas Gnome Coloring Pages to get the complete set.
The free printables are for personal use only.
Christmas Gnome Painted Rocks FAQ
What kind of paint is best for painting gnomes on rocks?
Acrylic craft paint works very well for painting rocks because it is easy to use, dries fairly quickly, and comes in plenty of colors. Acrylic paint markers are also helpful for adding tiny details.
Do I need to prime rocks before painting them?
You don’t have to prime every rock. I recommend starting with a clean, completely dry rock and then adding your background color. A couple of thin coats will usually give you a nice surface for the gnome design.
Can kids make Christmas gnome painted rocks?
Yes. Older kids can follow the full step-by-step tutorial, while younger kids can make simplified versions with a basic hat, nose, beard, and body. Adults may want to help with the smaller details.
Do I need to seal painted rocks?
If you’re keeping your gnome rocks indoors, sealing is optional. If you plan to place them outside, a clear protective sealer can help protect the paint from moisture and everyday wear.
What colors should I use for Christmas gnome rocks?
Traditional red, green, white, and winter blue are always cute, but there are no rules. Pink, turquoise, purple, gold, silver, and pastel Christmas colors can be just as fun.
Are Christmas gnomes hard to paint on rocks?
Not at all. The design looks detailed when it’s finished, but it’s really made from simple shapes. Start with the nose, add the beard and body, then finish with the tall hat and decorations. Once you’ve painted your first gnome, the next one becomes much easier.
Ready to Paint Your Christmas Gnomes?
These Christmas gnome painted rocks are one of those projects that can be as simple or as detailed as you want.
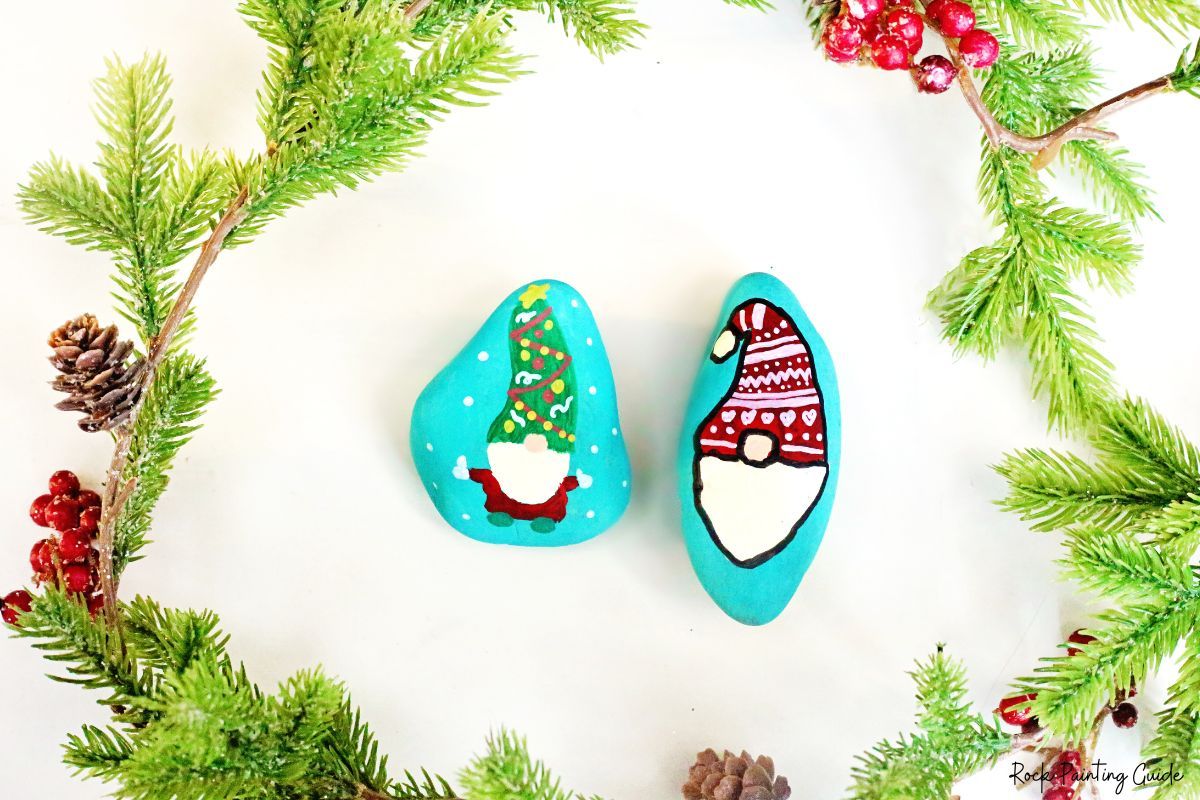
Paint one cute gnome for your Christmas decorations or make an entire collection with different hats, colors, and personalities.
Gather a few rocks, put on your favorite Christmas music, and enjoy a little creative time during the busiest season of the year.
And don’t forget to grab the FREE Christmas Gnome Coloring Pages for even more gnome inspiration.
Happy painting, my gnomies!

.jpg?updatedAt=1763470237633 "Easy Christmas Gnome Painted Rocks: Step-by-Step tutorial 16")
